-
1
Whisk and Rest the Batter
15 Mins • Whisk & Rest
Room temperature, about 20°C (68°F)
Put the eggs and sugar in a large bowl and whisk for about 2 minutes until the sugar has dissolved and the mixture is pale and slightly foamy. Stir in the coconut milk, vanilla extract and water, then sift in the rice flour, plain flour, tapioca starch and salt and whisk until completely smooth, with no lumps. Stir in the black sesame seeds and leave the batter to rest for 10 minutes.
Resting matters — it lets the rice flour absorb liquid, so the wafers bake evenly instead of staying floury in the middle.
Done when: The batter is smooth, lump-free and runs off the whisk in a thin ribbon, like single cream.
-
2
Heat the Oven and Line the Trays
5 Mins • Prep
180°C (350°F)
Heat the oven to 180°C (350°F). Line two large flat baking trays with baking paper — flat trays without a rim are easiest, so the wafers slide off. Keep a wooden chopstick or the handle of a wooden spoon, a palette knife and a wire rack by the oven.
Do not grease the paper — the batter has enough coconut milk to release on its own, and grease makes the wafers limp.
Done when: The oven is fully hot and the trays are lined and waiting.
-
3
Spread and Bake the First Tray
10 Mins • Bake
180°C (350°F)
Stir the batter once, then spoon about 1 tablespoon onto the lined tray for each wafer and spread it with the back of the spoon into a thin round about 10 cm across — six wafers fit on a large tray. Bake for 8–10 minutes until the edges turn golden brown and the centres are pale gold and set.
Spread thinner than you think — a wafer you can almost see through bakes crisp; a thick one stays chewy.
Done when: The edges are golden brown, the centre is pale gold and firm, and the wafer lifts cleanly off the paper.
-
4
Roll the Wafers While Hot
5 Mins • Roll
Hot from the oven, about 180°C (350°F) — handle with care
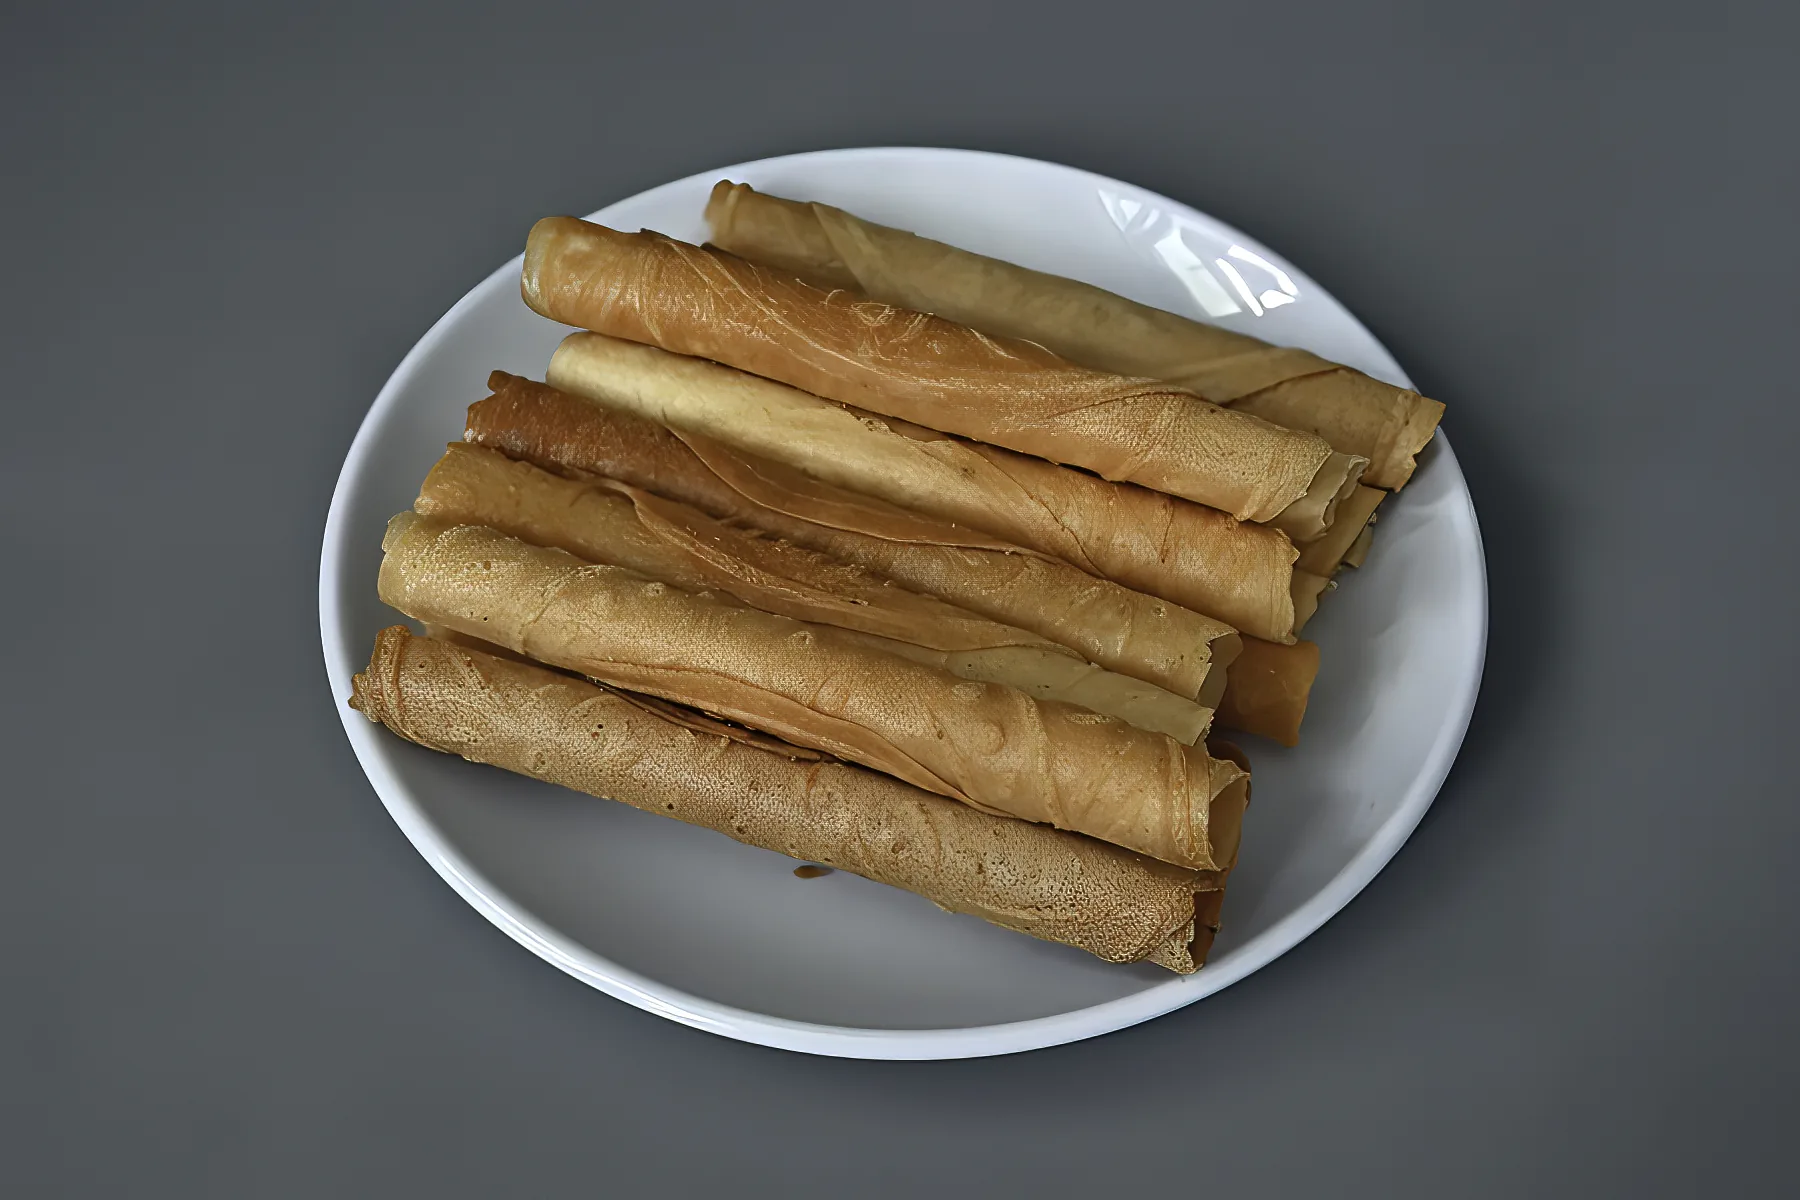
Take the tray out and work fast while the wafers are still hot and pliable: slide the palette knife under one wafer, lay the chopstick across one edge and roll the wafer around it into a tight tube, then slip the chopstick out and lay the roll seam-side down on the wire rack. Repeat with the rest of the tray — you have about a minute before each wafer stiffens.
If a wafer stiffens before you roll it, pop the tray back in the oven for 30 seconds to soften it again.
Done when: Each roll is a tight golden tube that holds its shape on the rack and starts to feel crisp as it cools.
-
5
Bake the Remaining Trays
20 Mins • Bake
180°C (350°F)
Stir the batter before each tray, then repeat the spreading, baking and rolling for the rest of the batter — about three more trays of six wafers, 24 rolls in total. Let each tray cool on the rack while the next one bakes, and keep the finished rolls in a single layer so they do not soften against each other.
The batter thickens as it stands, so stir it well before every tray and add a splash of water if it stops spreading thinly.
Done when: All 24 rolls are golden, tightly rolled and crisp when cool.
-
6
Cool Crisp and Store
5 Mins • Cool
Cool to room temperature, about 20°C (68°F)
Leave the rolls on the wire rack until completely cool and crisp — about 5 minutes. Eat some warm, and pack the rest straight into an airtight tin while they are still crisp, so the air cannot soften them.
A pinch of uncooked rice in a small cloth bag in the tin helps keep the rolls dry and crisp.
Done when: The rolls snap cleanly when broken and taste light, crisp and coconutty.
auto_awesome Finishing Touches & Plating
Serve the kuih kapit at room temperature, four rolls per person, with hot jasmine tea or kopi-o on the side — the rolls should be golden, feather-light and crisp enough to snap, with black sesame seeds speckled through every wafer.

 Malaysia
1h 10m